Thursday, January 19, 2012

Pillows, Pillows and an Apron

So, I've been MIA lately. Not that many people even read this, but my apologies still. November and December were't big sewing months for me, but I've managed to get a few things sewn this month so far. Just thought I'd share! There seems to be a plethora of pillow covers, but they do make nice gifts, and we've had some friends in the hospital as of late, and I think these are a nice thing to look at amongst all the hospital white.

These first two pics are all of travel size pillows and cases (one to use, one for the wash). The Amy Butler and other flower print are for the mother (and my friend) whose adult son is in the hospital battling cancer. The other two in the photo are for the patient himself (also our friend). He's a twenty-something guy, so I tried to keep it manly. The map print is one of my faves and the grey linen is just the perfect shade.


This set is for another friend at the hospital. She's such a beautiful person and these colors just reminded me of her. I only had a half yard of this Tula Pink "Fans" print, and I used almost every scrap of it for this gift. I think I need another few yards...I just love the colors. The mint green fabric is a light, airy cotton/linen blend from JoAnn's clearance rack a few summers back. It has pretty metallic gold threads running through it, adding just the right amount of sparkle:)


This is the card I made for the second set of pillows:


And the pillow and extra case, all wrapped up in a pretty little drawstring bag:


Our living room couch has been needing new pillow covers for a long time now. I finally got to them:


I talked about getting this Lou Lou Thi fabric back in June!! Yes, that is how long it takes me sometimes to get to a project...sad, I know. Here's the backs:


I admit they are exactly what our couch needed to spruce it up. They are both quilted on both sides, so they are essentially 4 mini quilts! They took a few days to finish. There is also cording around the perimeter and invisible zips for easy washing! So glad I finally got to them!

And the other day, when I was supposed to be sewing a skirt, I got inspired to make an apron instead. I love this AMH Little Folks Voile (it's even the incredibly HTF Dobby!!). Finally, after hoarding it for a couple of years, I've cut into it, and I'm glad I did. The fit on this apron is not perfect, but not bad for how quick it came together.


I do have some pics of a skirt I sewed in December, but I'll save those for another day! Have a wonderful day!
~Ruth


Sunday, October 9, 2011

Patterns With a Following

I have steered clear of most commercial patterns for clothing for some years now, after my earlier attempts were not so successful. Of course part of this was no doubt my inexperience, however, the taste left was so bitter, I've turned away and not looked back. Instead, I've had the opportunity to grow my own skills in pattern drafting. I've been happy with the results usually, though more effort is needed to get a finished garment. Being a busy mom, I don't always have the time to make my own patterns, and at times like these, I am very grateful that there are quality pattern companies out there that make easy,  understandable, and beautiful patterns.

I'm going to take the plunge and try out Colette Patterns, like every other sewing lady out there. They have almost a cult following. Most blogging sewists I've seen have not done just one pattern, but several, and often the same pattern several times over again! These patterns get rave reviews. Just by reading on the company's blog, I've learned sewing tips that I had not known before. Reading it reminds me how much there is still for me to learn in the art of pattern drafting and couture garment sewing. I'm willing to keep trying, but until I'm able to draft all my own patterns, I'm sure glad I've found Colette Patterns to make my life a whole lot easier!

The first (and only) pattern I own from CP is the lovely Crepe, which is a cool twist on the ever-popular wrap dress. Instead of wrapping in the front, it wraps in the back.

The next pattern I am planning to try is the Jasmine. To be honest, when I first saw it, I wasn't inclined to really think it would be a pattern I'd like to make. But then, I saw this version that Sarai (owner and artist behind Colette Patterns) made for herself, and I was sold almost instantly.

Ok, so ends my discussion on Colette Patterns. Thank you for hanging around (if you did!)

~Ruth

Saturday, October 8, 2011

A bag I loved...

This bag was the sister of a bag I'd made a few days earlier for a friends baby shower. I loved that one so much, I decided to make another one. It ended up going to a very special friend who babysat for us when no one else was available...Thank you again!!! This friend tells me she loves her new bag and I'm so glad! I really enjoyed making it!

This bag is reversible. One side is chocolate brown corduroy and the other is a gorgeous teal plaid that has metallic threads going through it....so fabulous!! The accent fabrics are scraps from Anna Maria Horner's Garden Party line. I've been hoarding these scraps and this was the perfect project!

Here's the pics:


With the two pockets on the inside and the sweatshirt-style pocket on the corduroy side, it is nicely organized, yet roomy for whatever else you may need to carry around in it.

The next bag I make will be similar in style, but made from silk dupioni. It will still be interlined and probably reversible, but I love how strong, yet thin dupioni is. All the stuff I haul around is heavy enough, I need a bag that is light weight.

In fact, my next bag after this corduroy one was in fact from silk dupioni. It's the bag I'm currently carrying right now as a purse. Here's some pics:


This bag is only a single layer of silk dupioni, and it can scrunch up into it's own little attached pouch a-la-reusable-bag-style. This is what happens when you get a woman who has a penchant for both reusable bags and natural fibers. This is my second reusable bag style in silk. The other one I have been using for over two years and it still looks brand new. Seriously...silk is the bomb! It's so durable! The other one was black for the body and the strap was the same strap fabric as this one. I adore it, but I wanted an adjustable strap, a smaller body, and more fun colors. (the first bag was a replica of my favorite reusable bag...Flip and Tumble. While it's great, the bag is quite large. I didn't need it to be that big for my every day bag).

The strap on this bag is all one piece, also creating a gusset and side panels for the body of the bag as well. On the opposite end is a fabric loop to tie the strap to. What I love about this is that the strap can by tied at any length I need. Usually it's tied short, to be a shoulder bag. But when I'm out shopping, I can quickly retie it to a cross-body bag and be hands free. The width also distributes the weight on my shoulder quite nicely. (Does it show that I used to be a babywearer? lol!) I <3 this bag!

So, why am I still planning another bag, if I love this one so much? Well, I need pockets. Something this one doesn't have. Yes, I could have added them, and almost did, but I just loved the fabric so much as it was. However, despite my organizing in zippered pouches, it still tends to be a "black hole" and I am constantly fumbling to find my phone, wallet, or glasses case ( I clip my keys to the fabric loop, so I never have to hunt for those). So, while I'll still use this bag regularly I'm sure, I'd like to try out a more pocketed version w/ a little more substance to it, but still keeping it light-weight. It's a challenge I am eager to meet!

~Ruth


Wednesday, August 10, 2011

A Silk Skirt and Lessons Learned

Last month, we had dear friends get married. Only two weeks before that, we had been in Wichita, Kansas, visiting my family. During that trip, my sisters and I had a girls' night out in Kansas City. Amongst all the lovely shops in the Plaza section of the city, I hardly expected to find a fabric store. And certainly not a fabric store that sold high-end, luxury fabrics! In fact, when I saw "Kaplan's Fabrics" on the map, I couldn't believe it, and had to call the store to make sure I wasn't going on a wild-goose chase! Fortunately, it was not in vain. Indeed, Kaplan's Fabrics is what all fabric stores should be...filled with fabulous fabrics from ceiling to floor, from wall to wall. I had been there for quite a while and was still finding bolts I hadn't seen on my first tour of the store. The owner knew the fiber content and price (along with the story of where it came from) for every single bolt of fabric in the store (I know, because I think I looked at almost every one!) It was amazing. Truly one of my favorite fabric stores of all time. Well, I certainly couldn't leave such a store with out buying some fabric...this is me, after all!

I determined that the gorgeous silk (scarf-weight) fabric should become a skirt that I could wear to the wedding we had coming up. I knew that I'd only have one week once we got home from vacation to draft the pattern, test it, and then sew up the skirt...not to mention I had no idea what to wear as a top with it. A tall order? Yes. But I did manage to pull it off, but not without some tears and wondering why I had gotten myself into such a position before it was done!

Here's the result:


I cannot believe I'm showing a picture of my backside, but you can see the fabric better in this one, as well as the corset lace-up in the back (and one of my "lessons learned")

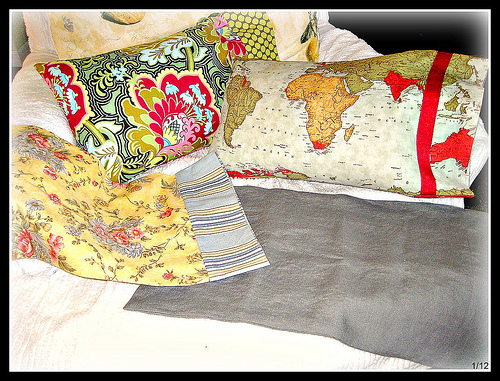
It's hard to see in the pictures, but this fabric is sheer in the black parts and shiny in the printed sections. This creates very fussy fabric to sew with.


Overall, I'm happy with the skirt, but it is definitely home to a multitude of flaws. And while I may not be experienced enough of a  sewer to create a flawless silk georgette skirt, I DO know that most people won't ever notice, let alone care if it isn't perfect. And so I wore it, and I felt beautiful with every swish of silk as I walked and danced:)

The basics of the skirt design: It's a bias cut half-circle skirt, with a yoke and invisible zipper. It is lined in 100% silk lining fabric (also from Kaplan's). It was cut in four pieces: front, back and front and back yoke. Same for the lining. It also has my signature corset lace-up back, for adjustability. I just can't convince myself to make clothes that aren't adjustable somehow. I hate not being able to fit clothes I sew.

"Lessons Learned"
This next part is mainly for my own benefit, so I don't forget the mistakes I made and how I could have avoided them. Since this blog is to document my sewing projects, I am putting this in here as well. I will always know where to find the information in the future. It just may help someone else too, if they should happen to ever be so bold as to fall in love with gorgeous silk georgette fabric and decide to make a skirt from it in a week's time. I can't be the only one!

In planning this skirt, I was a good little sewer and I tested my self-drafted pattern on other light-weight fabric (a cotton lawn that I didn't care for the print of). All seemed to be well. Good. I thought I should be good to go. Not so fast, there Speedy! This is SILK GEORGETTE we're talking about. Not a fabric to be dealt with like any other fabric. THIS is the GOOD STUFF. However, I was far too inexperienced with it to handle it properly, and believe me, I THOUGHT I was being careful. 

Lesson #1: Cutting the fabric on a bias fold. Not smart. I had cut the cotton lawn this way. I had even cut the two pieces of silk lining this way. All had been well. But I way underestimated the shift-ability of this sheer fabric, and it shifted while I cut, creating a back piece that was about 5 inches shorter than I had intended. 

This created a minor heart-attack when I realized what had just happened. There was no getting more fabric. I couldn't scrap this skirt...the fabric had cost too much, and I had put too much time and effort into it as it was. Plus, I had nothing else I felt comfortable wearing to the wedding.

I began brainstorming ideas to fix it or fudge it. Nothing seemed ideal. In the end, I decided that I might  be able to get away with doing nothing. But I wouldn't know until I finished the skirt and got to the hemming of it. I decided that I wouldn't worry about it until then. Thankfully, I was right. I was just able to get by with the length that I had (Though I DO wish it had been even an inch longer). I still am considering adding a flounce to the hem of the lining (in the outer skirt fabric, since I still have an extra half-yard left). But whether I actually do it, remains to be seen. 

Lesson # 2: No darts in originally. I had hoped to create a yoke pattern on the bias that did not require darts. Once the skirt was assembled, it was clear that this was not a good idea. So, I went back, unpicked a whole lot of stitches, and added darts to the front yoke. This helped enough so that I didn't have to do them in the back, though now I can see (especially in the close up picture of my backside), that back darts will help the top of the corset lacing to not be pulled so tightly (and give room to tighten it in case I lose weight). I may have to go back and add those too.

Lesson # 3: Have wonderful friends who will come and help you when you can't do something yourself!  I could not possibly have hemmed this skirt without the help of a dear friend (you know who you are!) I called her husband (since I didn't have her cell phone number on hand), the day before the wedding and left him a message to have his wife call me back quickly. I didn't want to scare her, but it would do no good for her to call me back at 9 o'clock at night. I needed her help, and I needed to know if she could or not quickly. Thankfully, she responded very fast, and was super willing to come over and help me pin up the skirt for hemming. I heart her! 

Lesson # 4: If you are going to get in over your head making a skirt with slippery silk fabric, make sure the fabric is gorgeous enough to hide all the mistakes. Despite all the flaws, mistakes and imperfections in this skirt, I did receive compliments on it. Most of them said they would never have guessed that I hadn't bought  it. I think that is a compliment. One random male-friend (about the age of my father), told me I looked "gorgeous" that evening. I was a little embarrassed by this, but flattered none-the-less, I admit. And of course, my own dear husband praised the finished result and said he was quite proud of me...music to my ears! I love you Hon!

Miscellany Lessons:
* Use new, sharp, fine tipped needles in your machine. 
*Do NOT attempt to serge. Even with the fine, new needles in your serger. Sergers like to eat silk georgette. At least mine does. 
*Pin like crazy, and watch out for pins that fall out of the fabric. 
*Finish seams with a tight zig-zag stitch in the seam allowance. 
*Hand wash or wash on extra-delicate cycle in machine and hang-dry.

And so that ends my lessons on sewing with silk georgette fabric. I hope these tips can help others in the future, and myself as well! I don't want to make the same mistakes twice!


Tuesday, August 9, 2011

Felted Wool Water Bottle Holders and Tutorial to Make Your Own!

So, I had said I write a post about the water bottle holders I've been making. I admit they are very addicting to make, since they knit up so quickly!


They are made with 100% wool roving yarn (also called single-ply bulky sometimes). I've been buying it at JoAnn's, but most yarn shops (brick and mortar as well as online) have some, though the colors are sometimes limited. I've been using size 10 1/2 DPNs, then switching to circulars. But you can do the entire thing on DPNs if you prefer. I'm also planning on experimenting with size 9 DPNs for the ribbed section on top, since it still has a tendency to not felt up as tight with the rest of the piece.

Here's a completed holder, before it's been felted. This is a 40 oz Klean Kanteen bottle, which it is made to fit.


The pattern is my own design, and it's very simple.

This is intended to fit standard 18-27 oz Klean Kanteen stainless steel water bottles. 

Materials:
size 10 1/2 Double Pointed Needles ( you can do the entire thing in 10 1/2 DPNs, or you can use a smaller needle size for the ribbed section. I've used 10 and am experimenting with size 9. Also, you may wish to switch to circulars after the first 5 or so rows. I find it much easier to start on DPNs, due to the number of stitches being cast on.)

Cast on 40 stitches (48 st for a 40 oz bottle)
Rnd 1: K2, P2, continue to end of rnd.
continue to work in 2x2 rib for 15 rnds.
Knit 40 rnds in stockinette (55 rnds for 27 and 40 oz) 
(I have not made any holders for the 12 oz, but my guess would be at this point to knit 20-25 rnds, after the 15 rib)

To form the bottom:
Begin decreasing: 
Round 1: k8, k2tg. Repeat to end of rnd (k10, k2tg, repeat to end of rnd for 40 oz)
Round 2: k7, k2tg, repeat to end of rnd (k9, k2tg, repeat to end of rnd for 40 oz)
Round 3:k6, k2tg, repeat to end of rnd (k8, k2tg, repeat to end of rnd for 40 oz)
You get the idea here, right? Keep decreasing the rounds until you have only one stitch left. Knot it and weave in the ends.

There. Now comes the felting. Now I know I do not necessarily do it the "right" way. But it works for me, and it's easy-peasy. I throw it in the washing machine on a hot/cold, delicate cycle with one rinse and a little bit of detergent. I've heard that you should not allow felting items to go through the spin cycle, but I haven't had any problems with these holders. Feel free to skip the spin cycle if you like. The basic point is that you need to get the holder down the size of the bottle. If you have the bottle on hand, use it to check the progress of the holder. I usually put mine in the dryer too, but again, this is optional. It can be left to air dry (perhaps stuffed with paper to hold the shape)

If you notice, some of the holders pictured are folded over at the top. This was because they were too tall for the bottles. I was able to get the grommets through two layers, but it was a little tough. I have altered the pattern to make the holders shorter, therefore folding shouldn't be necessary. 

Next step is to add the grommets. I find placing them a little lower is better. I use extra-large grommets, and 1 inch wide strapping (for the strap). I like to make the strap adjustable, so I use a plastic strap adjuster for that purpose. Wa-La...a new wool water bottle holder! The great thing about it is that it is a natural insulator! Enjoy! (If you are interested in a full step-by-step tutorial, please contact me. I won't bother if no one is interested!)

NOTE: I have never done a knitting pattern before for others to use, so be gentle with me if I don't do it exactly correctly. Experienced knitters should have no trouble following it (or making it up for themselves!) If you have any questions, please feel free to contact me, I'd be happy to help! 

ALSO: PLEASE DO NOT USE THIS PATTERN FOR SELLING WATER BOTTLE HOLDERS YOU MAY MAKE FROM IT. IT IS FOR PERSONAL USE ONLY. I F YOU ARE INTERESTED IN SELLING HOLDERS MADE FROM THIS PATTERN, PLEASE CONTACT ME. 

These particular holders have been in use for a few months now, and they are holding up very well. I noticed that the 27 oz holder (not pictured) really stretched out alot. I think it's the weight from the water dragging it down. I also think I needed to place the grommets a little lower, to offset the weight. I don't have pics of it, but  I will get some up soon.

And so there you go...my first pattern on this blog! And it's free! I hope someone else can enjoy it as much I have! (and I DO have a few of these all knitted up that I need to finish and list in my Etsy shop, in case anyone is interested in purchasing a ready-made one! Feel free to contact me to give me encouragement to get going on these!)


Wednesday, July 20, 2011

So Much to Catch Up On!

I realize I've been MIA for several weeks. Part of that was due to our get-away to the lovely state of Kansas to see my family, and partly because once we got back, I had a week to make a skirt for a wedding, including drafting and trying out the pattern first. Even now, I have a special event this weekend, but I did want to post at least a LITTLE bit of what I've been up to sewing-wise this past month or so:)

FIrst up...I'm always excited to share pics of things I've made...but when they are to be gifts and the receivers may possibly read this blog...I'm forced to hold back until after the gift has been given to post about them. Case in point: Leather Notebook Covers for my mom, sisters, niece and daughters. Whew...that was a lot of leather sewing! Thankfully my Baby (my old Kenmore sewing machine that was my inheritance from a very beloved aunt) was up to the task!

So, here's a few pics of the leather notebook holders!


I love the Heather Ross fabric on these! The dogs are just too cute! The two for my daughters are similar, but one is stitched in pink thread and the other in red. The back round on the fabrics is different too, since I was able to get different colorways of the same print. My niece's is stitched in orange. Thankfully the kids all seem to love them! The girls are all just old enough to appreciate a nice sized notebook for all their picture-making, story-writing adventures! Now, of course, the mini notebook I made for my 4 year old son, is not quite enough for him...he wants a big one like his sisters. And so I will make him one too. I might as well...

Next were the leather notebook covers for my mom and sisters. These are a smaller size. I am really happy with the results...now to make one for me!! i could really use it this weekend!


The backs all have my new "Vintage Ruth" labels on them...thanks to my super sweet friend Alanna, and her very computer-savvy, graphic-designer hubby! Thank you so, so much!!

 So, those are the notebooks covers. I'm pleased with them, but now need to make a few more.

Two last gifts for my niece...a water bottle holder and a door-sign. I know, don't they sound like very exciting gifts for a 6 year old? Well, they are at least practical (she has toys a plenty!)


The sign is hand-embroidered (in case it's hard to tell on the computer). I had a lot of fun doing it too (except the lettering...I found I stink at the satin stitch, LOL!) These embroidery hoop hangings are all the rage in blog-land, but this was my first time trying one out for myself. I would happily do more though!
And here is my adorable niece Libby, holding her notebook and wearing her water bottle holder. (The new 18 oz Klean Kanteen was part of the gift.) Since her cousins (aka, my kids!) all had water bottles and holders, I thought she might like to have one too, especially since we were planning a few outings while were there. And let me tell you...the Kansas heat can get to you after a few minutes of sun! Water is very necessary!

I'll do a separate post on the water bottle holders soon. There's too much to say and this post is already pretty big!

So, there's part of the fruits of my sewing labors the past month! I'll be back soon!

~Ruth

Monday, June 20, 2011

My Laundry Line Never Looked So Good!

To say the least, these gorgeous new fabrics make my line look awesome! (I wish I had spare just to leave hanging all the time, so that every time I look out the window, I'd catch a glimpse of them!)


Wondering what they are? (I say this for my family that reads this blog but don't have much interest in sewing themselves...) They are from Anna Maria Horner's new line LouLouThi. Yes, I adore her fabrics. This is her latest line. I love it. I want more of course, but for now, this is what I have. This fabric will be turned into pillow covers for our upstairs couch. I have wanted covers for the regular pillows ever since we got the couch (about 4 years ago), but had never gotten the perfect fabric for them. Now I have it. This is one project getting bumped up on the (very long) sewing list! I can't wait to make them!

Thanks for letting me share!
~Ruth